
Need a new email address? You’re in the right place! Creating an email account is easier than you think. Whether you want a personal email or a business email, I’ll walk you through everything step by step.
What You Need to Create an Email Account
Before we start, here’s what you’ll need:
- A phone number for verification
- About 5-10 minutes of your time
- A strong password idea
- Your basic info (name, location)
That’s it! Let’s get started.
How to Create Any Email Account – The Basics
Most email providers work the same way. Here’s the simple process:
Step 1: Go to the email provider’s website and click “Sign Up”
Step 2: Pick a username and password for your new account
Step 3: Fill in your basic details like name and phone number
Step 4: Agree to their terms and click “Create Account”
Step 5: Check your phone for a verification code and enter it
Step 6: Done! Your email is ready to use
Easy, right? Now let me show you how to do this with Zoho Mail, which is a great free option.
Why Choose Zoho Mail?
Zoho Mail is awesome because:
- It’s completely free for personal use
- No annoying ads in your inbox
- Great security and privacy protection
- Works on all devices
- Comes with helpful tools for organizing emails
How to Create a Zoho Email Account
Let me walk you through creating a Zoho email account step by step:
Step 1: Visit Zoho Mail Website
Go to the Zoho Mail website and click on “Personal email” if you want a personal account.
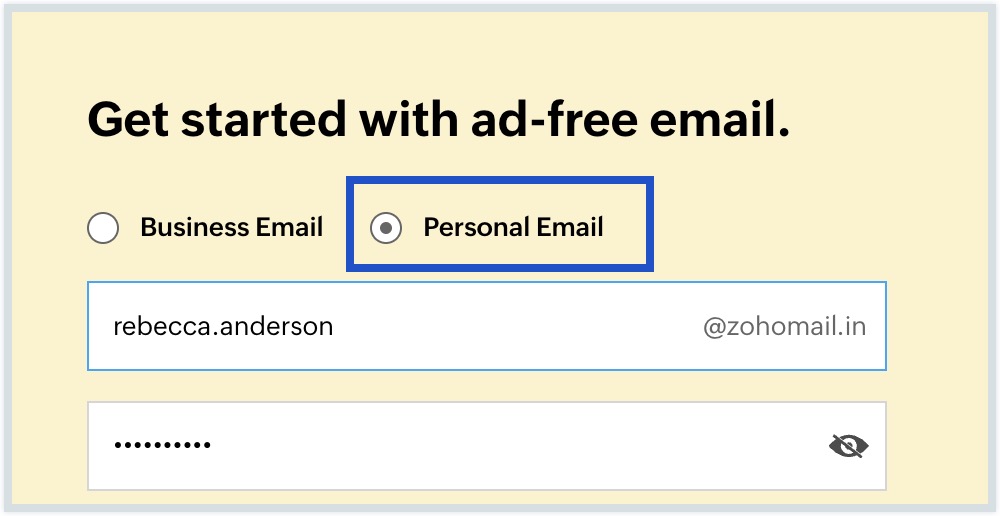
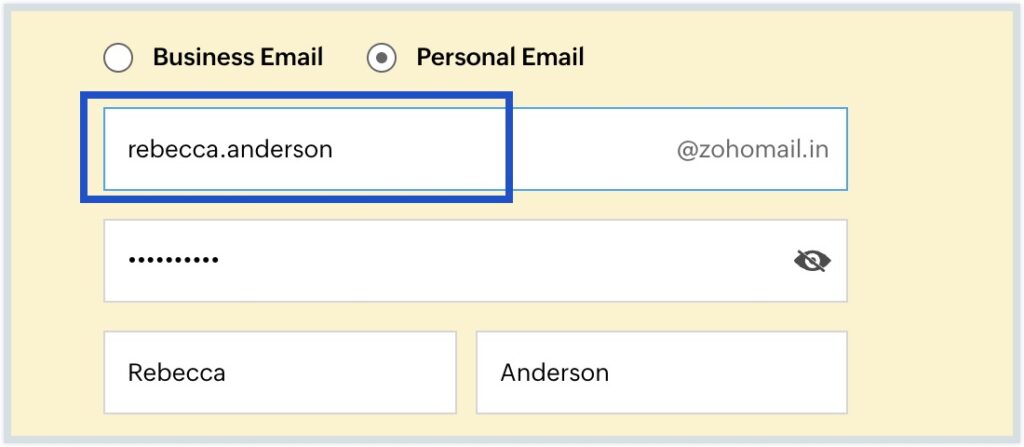
Step 2: Choose Your Username
This is the fun part! Pick a username that will become your email address.
Tips for choosing a good username:
- Use your name or a variation of it
- Keep it professional if you might use it for work
- Make it easy to remember and spell
- Avoid numbers and special characters if possible
Your email will look like: yourname@zohomail.com
Important: Your email ending depends on where you live:
- US users get: yourname@zohomail.com
- European users get: yourname@zohomail.eu
- Indian users get: yourname@zohomail.in
- Australian users get: yourname@zohomail.com.au
Step 3: Create a Strong Password
This is super important! Your password should be:
- At least 8 characters long
- Include both uppercase and lowercase letters
- Have at least one number
- Include one special character (like ! or @)
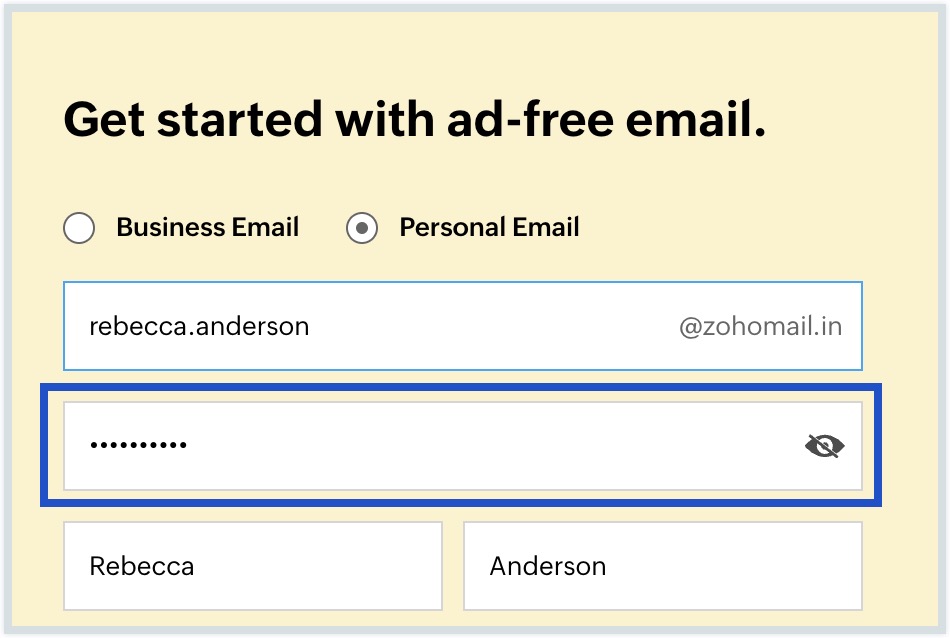
Example of a good password: MyDog2024!
Don’t use: password123, your birthday, or your name
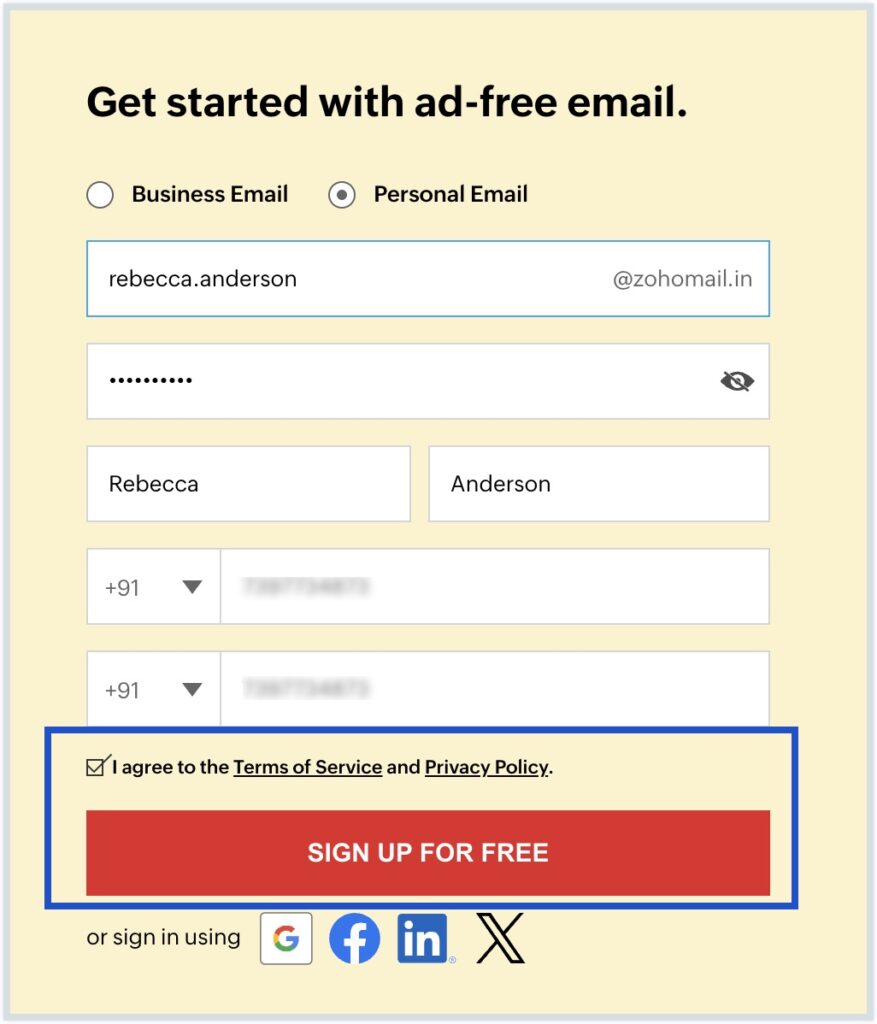
Step 4: Enter Your Personal Information
Fill in:
- Your first name
- Your last name
- Your phone number (needed for verification)
Make sure your phone number is correct – you’ll need it in the next step!
Step 5: Agree and Sign Up
Read the terms (or at least skim them) and click “Sign up for Free”
Step 6: Verify Your Phone
Zoho will send a code to your phone via text message. Enter this code to prove it’s really you.
Step 7: Start Using Your Email!
Congratulations! Your new email account is ready. You can now:
- Send and receive emails
- Organize your messages
- Access it from any device
Read More: How to Share Your Calendly Link: Easy Ways to Book More Meetings
Quick Alternative: Sign Up with Social Media
Want to make it even easier? You can also create a Zoho account using:
Just click on one of these options, and it will connect your existing social media account. You’ll still need to choose a username for your email address.
Pro Tips for Your New Email Account
Keep your account secure:
- Never share your password
- Log out when using public computers
- Turn on two-factor authentication if available
Stay organized:
- Create folders for different types of emails
- Delete emails you don’t need
- Check your spam folder occasionally
Be professional:
- Use a clear subject line in your emails
- Keep your messages polite and clear
- Double-check before hitting send
Troubleshooting Common Problems
Username already taken? Try adding numbers or your middle initial.
Not getting the verification code? Check your spam folder or wait a few minutes and try again.
Forgot your password already? Use the “Forgot Password” link on the login page.
Can’t access your account? Contact Zoho support – they’re very helpful.
What’s Next?
Now that you have your email account:
- Set up your profile with a photo and signature
- Download the mobile app so you can check email on your phone
- Import contacts from your old email if you have one
- Start sending emails to test everything works
Final Thoughts
Creating an email account doesn’t have to be complicated. With Zoho Mail, you get a professional, secure email address in just a few minutes.
Remember to keep your login details safe and enjoy your new email account!
Need help? Zoho has great customer support if you run into any issues. Most problems are quick and easy to fix.